


Who says changing your brakes can’t be entertaining? In today’s blog, we’re diving into the hilarious (and surprisingly educational) adventure of one of our R1 Crew members swapping out the brakes on his trusty Toyota Corolla. Spoiler alert: you might laugh, you might learn, but you’ll definitely appreciate the magic of a good brake kit by the end. Let’s roll!
“Meet Ray Leota, the Toyota Corolla”
Why the Toyota Corolla? It’s a common car, perfect for showcasing that you don’t need a luxury vehicle to deserve top-notch brakes. Plus, our hero’s brakes were making some questionable metal-on-metal sounds—a telltale sign it’s time for a change.
As part of regular brake maintenance, it is crucial to check the brake fluid level in the brake fluid reservoir. Ensuring the fluid level is appropriate can prevent overflow when compressing the brake caliper piston, and it is important to cap the reservoir properly after checking to prevent spillage.
“Introduction to Brake Maintenance: The Basics”
Brake maintenance is like flossing your teeth—essential, but often overlooked. At its core, brake maintenance involves regularly checking and replacing your brake pads and rotors. These components are the unsung heroes of your disc brakes, converting kinetic energy into thermal energy through friction. Over time, even the best brake pads wear down, and ignoring them can lead to costly repairs. In this guide, we’ll cover the basics of brake maintenance, including how to spot the signs that you need new brakes, how often you should replace brake pads, and some safety tips to keep all your fingers intact.
“Signs You Need New Brakes: When Ray Starts Squealing”
Is your car trying to tell you something? If your vehicle’s brake system is making noises that would make a horror movie sound designer proud, it’s time to pay attention. Here are some telltale signs that you need to replace your brake pads:
- Squealing, squeaking, or grinding noises when you hit the brakes
- A pulsating brake pedal that feels like it’s doing the cha-cha
- Steering wheel shimmy that makes you feel like you’re in a dance-off
- Vibration under braking that’s more than just a gentle reminder
- Brake pads thinner than a quarter of an inch
These symptoms indicate worn-out brake pads, which can compromise your braking performance and safety. Don’t ignore these signs—replace your brake pads to keep your ride smooth and safe.
Step 1: The Gloves, the Tools, the Tape, and Check the Brake Fluid
Our R1 Crew member starts strong, wrestling with gloves like they’re puzzle pieces. “There’s a hole for each finger,” he declares, foreshadowing the many “dumb guy moments” to come. Oh, and the undercarriage? Let’s just say tape was used liberally as a previous “DIY fix.” Before starting the brake job, it is crucial to raise the vehicle safely using a jack.
Next, our hero tackles the wheel removal. He fumbles with the jack, and the wheel is finally off. Before removing the wheel, make sure to loosen the lug nuts to ensure the wheel can be taken off easily.
Step 2: Let’s Not Consult the Manual for Brake Caliper Piston
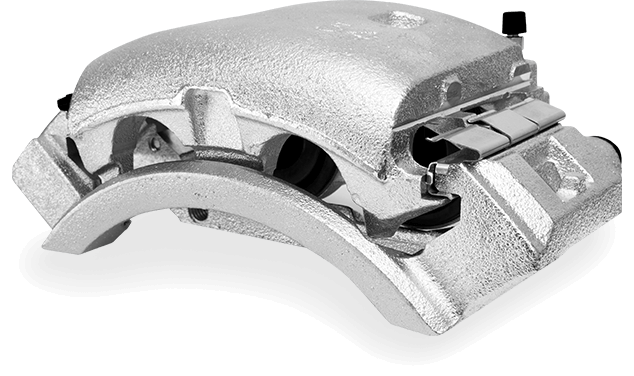
Armed with minimal preparation and a healthy dose of confidence, our brave DIYer approaches the job with expertise gathered from YouTube University. The first task? Removing the caliper. “Unbolt something,” he quips, channeling the spirit of every first-time DIYer. Carefully removing the caliper bolts is crucial to access the brake components. Rex, his watchful co-worker, is there to make sure nothing (too important) gets forgotten.
Inspecting the caliper hardware for wear or damage during the brake job is also essential to ensure proper functioning of the brake pads.
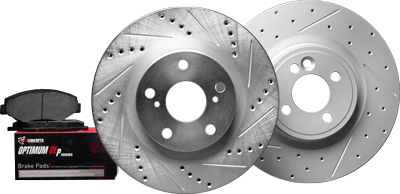
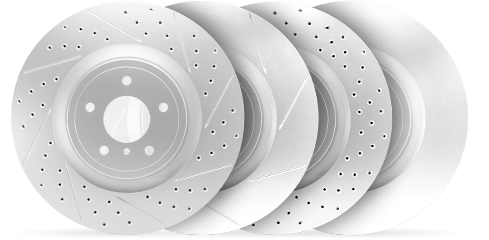
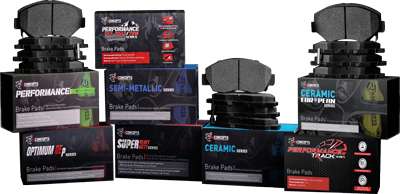
Step 3: R1 Brake Kits to the Rescue with Brake Pads and Rotors
After some good-natured fumbling, our Crew member unveils the star of the show: shiny new R1 Concepts Brake Kits. Unlike his previous “rusty and crusty” budget pads, these are built to perform. He even admits, “These are way better than the ones I got from AutoZone.”
It’s crucial to inspect the brake rotor for uneven wear and ensure proper fitment during installation.
“How Often Should You Replace Brake Pads? Timing is Everything”
Timing is everything, especially when it comes to replacing your brake pads. The frequency of replacement depends on several factors, including the condition and thickness of your brake pads, your driving style, the type of pads you use, the weight of your vehicle, and the loads you carry. Generally, you should replace your brake pads and rotors every 25,000 to 65,000 miles. However, it’s crucial to inspect your brake pads regularly to determine the best replacement schedule for your specific vehicle. Remember, a stitch in time saves nine—or in this case, a timely brake pad replacement saves you from a world of trouble.
“Step 4: Dumb Guy Counter: Ding!”
This wouldn’t be an R1 Crew production without some good-natured self-deprecation. From forgetting which way a part goes to overcomplicating the process, our DIYer racks up a growing “Dumb Guy Counter.” The takeaway? If he can do it, so can you.
- Always wear safety glasses.
- Disconnect the battery before starting any work.
- Use jack stands when working under the vehicle.
Additionally, check the brake fluid level in the reservoir and top it off if necessary.
“Safety Precautions: Keeping All Fingers Intact”
When it comes to working on your brakes, safety isn’t just a suggestion—it’s a necessity. To avoid turning your DIY project into a trip to the ER, follow these safety precautions:
- Park your vehicle on a dry, flat surface and use wheel chocks to prevent any unexpected rollaways.
- Don your safety goggles and protective gloves—fashionable and functional!
- Use secure jack points for the jack and jack stands, and be extra careful when lifting the car.
- Crack open the master cylinder reservoir to reduce pressure buildup.
- Use a C-clamp or interlocking pliers to push the piston back into the caliper.
By following these steps, you’ll keep all your fingers intact and ensure a successful brake pad replacement.
Step 5: Hammer Time (and Lube Sessions) to Replace Brake Pads
What’s a brake job without a little hammer action? Between whacks, there’s also the critical step of lubricating guide pins, which our DIYer dubs the “Lube Session.” Set to some funky music, of course. Safety glasses on, hammer in hand—he’s unstoppable.
A sticking caliper piston can cause uneven wear on brake pads and should be inspected during the brake job.
“Bedding Brakes: The Secret to Smooth Stops”
Bedding brakes might sound like something you do to make your car cozy, but it’s actually a crucial step in the brake pad replacement process. Here’s how to do it:
- Drive your vehicle at a moderate speed and apply the brakes firmly.
- Repeat this process several times until your brakes feel smooth and responsive.
This process helps break in your new brake pads, ensuring proper function and preventing premature wear on your brake pads and rotors. By taking the time to bed your brakes, you’ll enjoy smooth, safe stops and extend the life of your brake system.
“Final Thoughts: If I Can Do It, You Can Too”
After completing the job and a quick victory lap, our Crew member reflects: “Even a dumb guy like me can change their brakes with the help of a smart guy—or YouTube.” It’s true: replacing your brakes is not only a cost-effective way to maintain your car, but it’s also a surprisingly fun skill to learn.
Remember to tighten the lug nuts properly using a torque wrench according to the vehicle’s owner manual to ensure safety and precision in the wheel installation process.
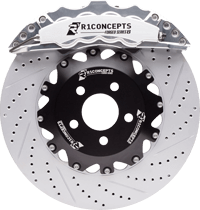
“Why R1 Concepts Brake Kits Are a Game-Changer”
If you’re going to take on a DIY brake job, why not upgrade to something that delivers superior performance? R1 Concepts brake kits are designed for reliability, longevity, and smooth stopping power. Whether you’re commuting, towing, or hitting the track, R1 has you covered.
“Ready to Brake Like a Pro?”
Inspired by this journey? Check out our R1 Concepts Brake Kits and take control of your next brake job. Remember: if our Crew member can do it (with a few bumps along the way), you’ve got this too. Don’t forget to like, comment, and share your own DIY brake adventures!
